How to configure APN settings on iPhone – Step by Step Guide.
For the iPhone (manufactured by Apple company) and other mobile devices, APN settings are necessary to access the Internet. The APN configuration settings are downloaded from the mobile operator during the GPRS network registration. But we can also configure the same manually using the graphical interface of the device. This tutorial describes how to do APN configurations on an iPhone.
APN settings by the mobile operator:
When you put a new sim card inside the iPhone and switch on the power, the data, and other services start automatically. It happens because the APN and other settings reach the device over the network and apply to the device.
After powering on, the phone does a GPRS location update with the network. The HLR in the home network sends the APN settings to the iPhone device configured in the subscription profile. On receiving settings, the iPhone starts using the APN for the data services.
Why do we need to configure APN settings on iPhones manually?
When not using wifi, you may not have the Internet working with your iPhone. However, having an active data plan. This could be due to incorrect APN settings. If you know what APN to use, then the following are the steps for changing APN settings manually. There may be some variations in the steps based on the iOS version. But conceptually, it’s similar.
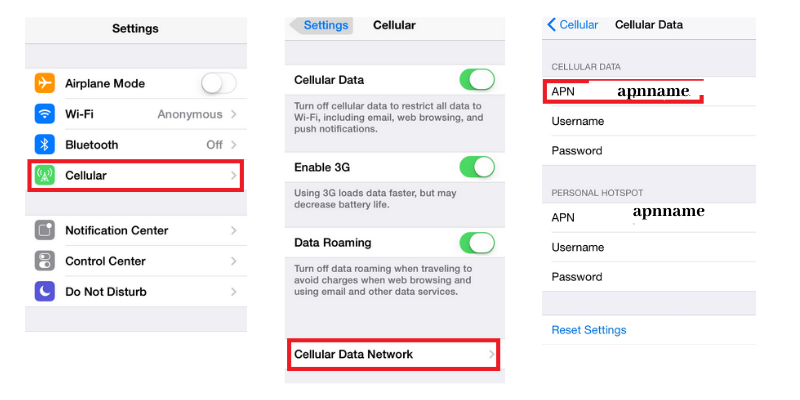
On the main screen of the iPhone, go inside the settings.
- In settings, there is an option for cellular once you click on this. You will get another menu.
- Now go inside the Cellular Data Network. There you will find the APN.
- Place the new APN in the space next to the APN.
- After changing the APN name settings, browse back to the home screen. The new APN settings have been updated.